
Repairs · Sydney homes

Window leaks & draught problems.

Why your windows are letting water and air through, the easy fixes you can try yourself, and when it's time for a proper repair.

Leaking and draughty windows are one of those problems Sydney homeowners learn to live with – until they shouldn’t. Energy bills go up 10–20% in older homes with bad seals. Mould grows. Walls and frames rot. Comfort drops. The good news is most of it’s very fixable.

Why window leaks & draughts matter

Three reasons:

  • Energy. A draughty window can leak 10–25% of your heating/cooling out the side. Add up over winter and summer, that’s a noticeable bill.
  • Mould and structural damage. Water ingress feeds rot in timber framing and breeds mould in plasterboard – both expensive to remediate.
  • Comfort. Cold downdraughts in winter, warm air loss in summer, and the constant low whistle of air through a perished seal – none of it improves the home.

Common causes of window leaks & draughts

  1. Damaged or worn seals. The most common cause. UV-degraded weather strip and perished glazing tape let air and water move freely. Easy to spot if you know what to look for.
  2. Poor installation. Frames not packed/levelled correctly, or fixed without weather-sealing the perimeter to the wall.
  3. Frame damage. Corrosion at corners, distortion from impact, or structural shift.
  4. Glass problems. Cracked silicone bedding, failed double-glazed unit seals, missing glazing beads.
  5. Structural movement. Heritage homes flex; sections of wall settle. Frames crack at the corners or pull out of plumb.
  6. Blocked drainage channels. Sliding-window tracks have weep-holes that drain water out. Block them with grit and the water backs up over the sill – into your home.

How to detect leaks and draughts

Five tests, easy enough to do at home.

Visual signs

Water marks on the sill, peeling paint, mould spots in corners, swelling at the base of the architrave. A torch raked along the frame from outside reveals gaps.

Condensation clues

Persistent condensation on or around a single window in cold weather often indicates poor sealing or thermal bridge – air is leaking around the frame.

The smoke test

Burn an incense stick or use a thin smoke source near the closed window. Watch for the smoke to curl – that’s draught movement. Test top, bottom, sides, and the meeting rail of sliders.

Listen and feel

Cold winter mornings make this easy. Run the back of your hand around the closed sash – you’ll feel the cold leak as a moving column of air.

Thermal cameras

If you have access to a thermal imager (cheap phone attachments now exist), cold spots around frames pinpoint air leaks instantly.

DIY vs Pro

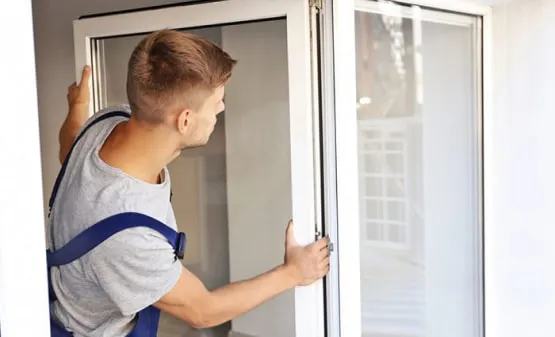
DIY vs professional window leak repair

When DIY is fine, when it’s false economy.

DIYProfessional
Replace weather-strip ✓ – simple, cheapYes (15-min job)
Re-silicone perimeter ✓ – if you’re comfortableRecommended for clean finish
Clear weep holes (drainage) ✓ – wire + vacuumYes during service
Replace glazing tape ✗ – needs to remove sashYes – pocket repair
Repair corroded frame corners ✗ – needs welding/patchingYes
Replace failed double-glazed seal ✗ – IGU replacement onlyYes
Re-square distorted frame Yes – or replace
Cost $30–$120$200–$1,500+
Time 1–4 hours1–4 hours per opening
Warranty No12 months minimum
Pro process

Our window leak repair process

When DIY isn’t cutting it, this is what you can expect from us.

  1. Inspect & diagnose
    01

    Inspect & diagnose

    Free on-site assessment. We test the window for air and water ingress and identify the failure points.

  2. Recommend a fix
    02

    Recommend a fix

    Smallest job that solves the problem. Usually a service + reseal. Sometimes a hardware swap. Occasionally a full unit replacement.

  3. 03

    Repair or replace

    Most repairs are completed in a single 1–2 hour visit. Where parts need ordering we secure the opening and return on a scheduled day.

  4. 04

    Test & guarantee

    Re-test under spray. Walk-through with you. 12-month workmanship warranty on every repair.

Preventing future leaks and draughts

  • Annual visual inspection. 30 minutes, twice a year. Eyeball every window from inside and outside. Note anything that looks tired.
  • Clean weep holes. A thin wire pushed through the sill drainage holes once a year keeps them flowing.
  • Wash silicone and rubber seals. Twice a year. Mild detergent, soft cloth – keeps UV degradation slower.
  • Replace weather-strip every 5–7 years. Even if it looks OK, the elasticity is mostly gone.
  • Check exterior render/silicone joint annually. The line where the frame meets the wall is the #1 hidden leak path.

Costs and energy savings

A typical Sydney three-bedroom house with bad seals leaks 10–20% extra heating/cooling. Sealing those windows for $400–$1,200 typically pays back in 2–4 years on the energy savings alone – plus the comfort and condensation benefits start immediately.

Get expert help today

If you’re past the DIY stage, we’re on 1300 854 726. We service Greater Sydney, Hawkesbury and the Blue Mountains – typically same-week for non-emergency seal work.

Sydney expertise

Need a glazier or door specialist?

We've been fixing windows and doors across Greater Sydney for 30+ years. Free quote, fast turnaround, written warranty.

South Windsor, NSW

Visit Our Showroom

See our full range of high-performance aluminium windows and doors up close, including the complete Vantage and Elevate collections. Compare hardware, colours, glass and operation in person.

location_on27 Walker Street, South Windsor NSW 2765

schedule Mon–Fri: 7am–4pm · Sat: By Appointment